

Key Takeaways
- The ‘Everything Shower’ Definition: A comprehensive, weekly self-care ritual involving hair masks, full-body exfoliation, shaving, and intensive moisturizing to reset the body and mind.
- Optimal Sequencing: Always follow the Top-Down method (Hair → Body → Face) to prevent residue clogging pores.
- Temperature Control: Use lukewarm water for hair and face to preserve cuticles and barriers; hotter water is permissible for body exfoliation phases only.
- Pre-Shower Prep is Critical: 40% of the efficacy comes from dry brushing and hair oiling before you even step into the water.
- Frequency Warning: This is a weekly or bi-weekly routine. Daily performance will damage the skin barrier and strip natural oils.
You know the feeling: your hair feels heavy with product buildup, your skin looks dull, your legs feel like sandpaper, and your mental state is cluttered. Standard daily showers just aren’t cutting it. You don’t just need to get clean; you need a reset.
Enter the Everything Shower.
This isn’t just about hygiene; it is a strategic, logistical operation designed to take you from “high maintenance” to “low maintenance” for the rest of the week. However, most people get it wrong. They exfoliate in the wrong order, wash expensive hair masks down the drain before they work, or destroy their skin barrier with water that is too hot.
In this guide, we break down the science of the Everything Shower. We move beyond the TikTok trends to provide a dermatologically sound, step-by-step protocol. We will cover the exact order of operations to maximize product absorption, the tools you actually need (and which to skip), and how to turn your bathroom into a functional spa. Prepare to scrub, shave, and steam your way to the best skin of your life.
Phase 1: The Pre-Shower Strategy (Dry Work)
Most amateurs mistake the moment the water turns on as the start of the Everything Shower. Expert Analysis shows that approximately 40% of the routine’s efficacy happens before you get wet. This phase focuses on lymphatic drainage and scalp preparation.
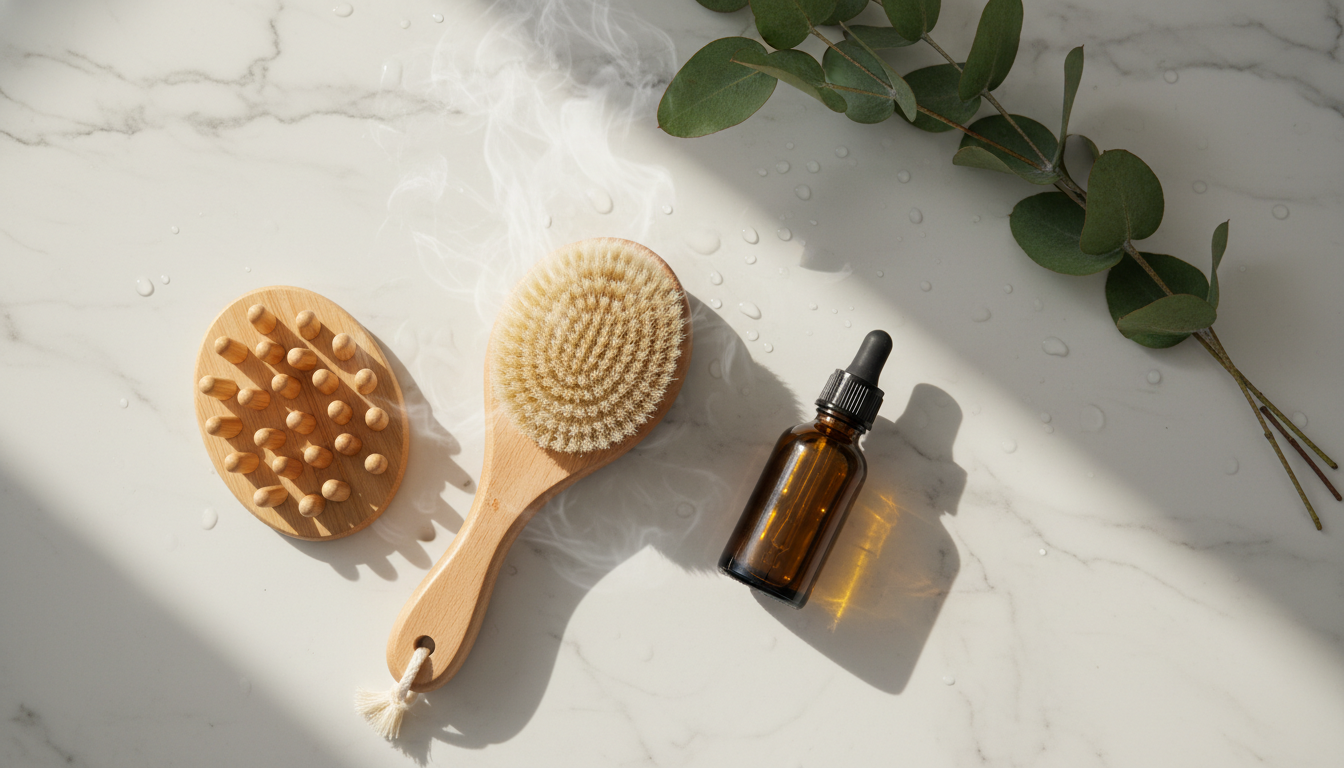
1. Dry Brushing: The Lymphatic Jumpstart
Don’t skip this. Dry brushing exfoliates dead surface cells and stimulates the lymphatic system.
- Technique: Start at your feet and brush upwards in long, sweeping strokes toward your heart.
- Pressure: Medium. The skin should turn pink, not red.
- Expert Tip: Focus on the backs of thighs and upper arms where Keratosis Pilaris (KP) often forms.
2. Scalp & Hair Pre-Treatment
Before wetting your hair, you must address the scalp microbiome and hair ends.
- Bond Builders: If you use products like Olaplex No. 3, apply them now to damp (mist-sprayed) hair. They need 10-30 minutes to cross-link broken disulfide bonds.
- Scalp Oiling: Apply rosemary or jojoba oil directly to the scalp to break down sebum buildup. Massage with a bamboo scalp massager for 3 minutes to increase blood flow.
| Treatment Type | Target Issue | Application Time | Key Ingredients to Look For |
|---|---|---|---|
| Clarifying Oil | Oily/Flaky Scalp | 15-20 Mins | Salicylic Acid, Tea Tree, Rosemary |
| Bond Builder | Chemical Damage | 10-45 Mins | Bis-Aminopropyl Diglycol Dimaleate |
| Hydrating Oil | Dry/Brittle Ends | 30+ Mins (or overnight) | Argan Oil, Coconut Oil, Shea Butter |
Set the Atmosphere
This is a sensory experience. The Everything Shower can take 45-90 minutes.
- Lighting: Dim the harsh overheads. Use waterproof LED candles.
- Scent: Hang a bundle of fresh eucalyptus over the showerhead (the steam releases decongesting oils).
- Hydration: Bring a bottle of ice water. The heat will dehydrate you internally.
Phase 2: Hair Hygiene & The ‘Marina’ Method
Once you step into the shower, hair comes first. Why? Conditioner and hair masks contain heavy occlusives that can cause bacne (body acne) if they run down your clean back. We wash hair first so we can wash the residue off our body later.
Step 1: The Clarifying Wash
Your first shampoo must be a clarifier. You need to strip the silicones, environmental pollutants, and the oil you just applied.
- Focus: Roots only.
- Rinse Temp: Lukewarm. Hot water blasts the cuticle open too wide, causing frizz.
Step 2: The Treatment Mask (The ‘Marina’ Pause)
Skip standard conditioner. This is an Everything Shower; we use a deep conditioning mask.
1. Squeeze excess water out of hair (waterlogged hair cannot absorb product).
2. Apply the mask from mid-lengths to ends.
3. Twist and Clip: Secure your hair on top of your head with a claw clip.
The ‘Marina’ Method: This refers to letting the hair mask marinate while you perform the body tasks. You need at least 7-10 minutes of dwell time for the proteins and lipids to penetrate the hair shaft. While this sits, you move to the body routine.

Phase 3: High-Performance Body Exfoliation
With your hair marinating safely out of the way, focus on the body. We are looking for comprehensive desquamation (shedding of the outer skin layer).
Chemical vs. Physical Exfoliation
For an Everything Shower, I recommend a dual approach, but you must be careful not to over-strip.
The Protocol:
1. The Soak: Stand under the warm water for at least 5 minutes to soften the keratin protein in your skin.
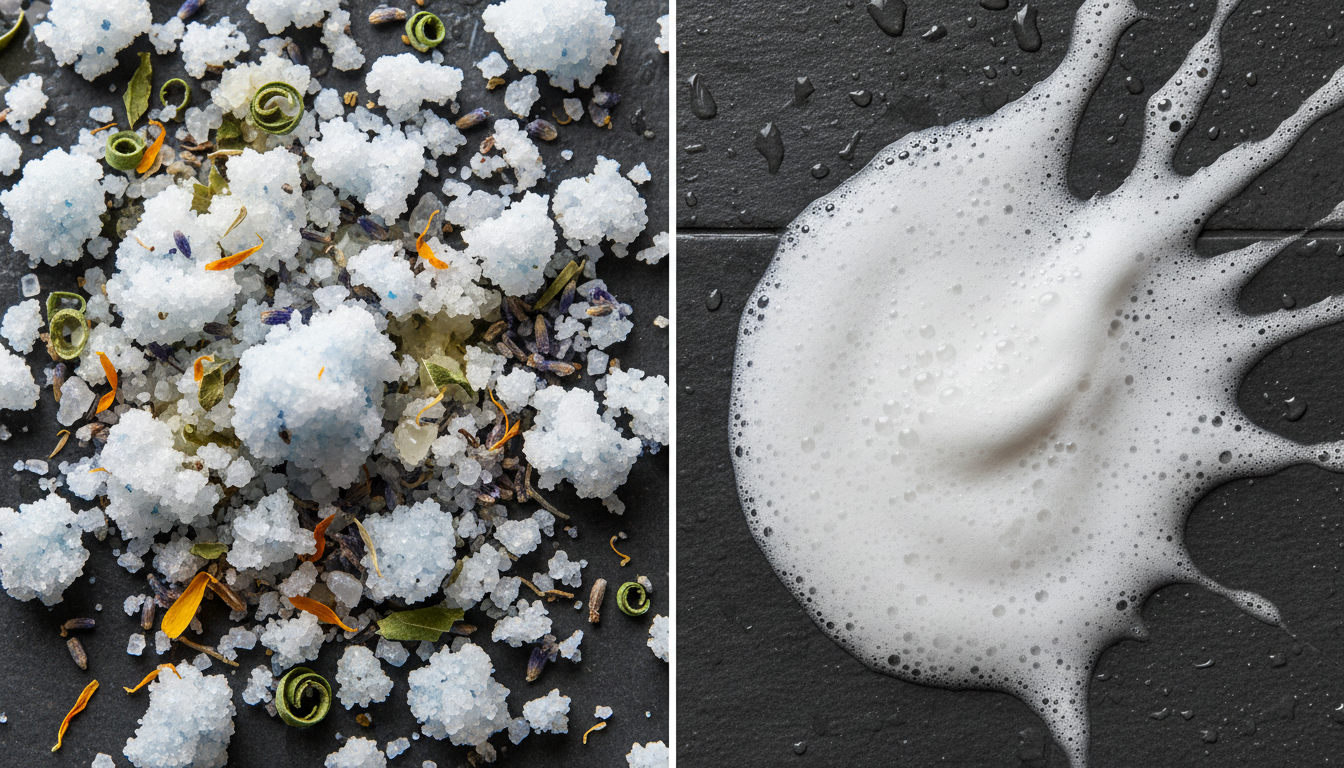
2. The Scrub: Turn the water off to save water and prevent the scrub from melting instantly. Apply a sugar or salt scrub in circular motions.
| Scrub Base | Best For | Abrasiveness | Notes |
|---|---|---|---|
| Sugar | Sensitive/Normal Skin | Medium | Dissolves faster; humectant properties naturally hydrate. |
| Salt | Rough Patches/Feet | High | Rich in minerals but can sting freshly shaved skin (do this BEFORE shaving). |
| Coffee | Cellulite/Circulation | High | Caffeine can temporarily tighten skin; messy cleanup. |
| Chemical (AHA/BHA) | KP/Acne-Prone | None (Chemical) | Use a glycolic acid wash instead of a scrub for sensitive areas. |
Warning: Do not exfoliate your face with body scrubs. The granules are too large and will cause micro-tears.
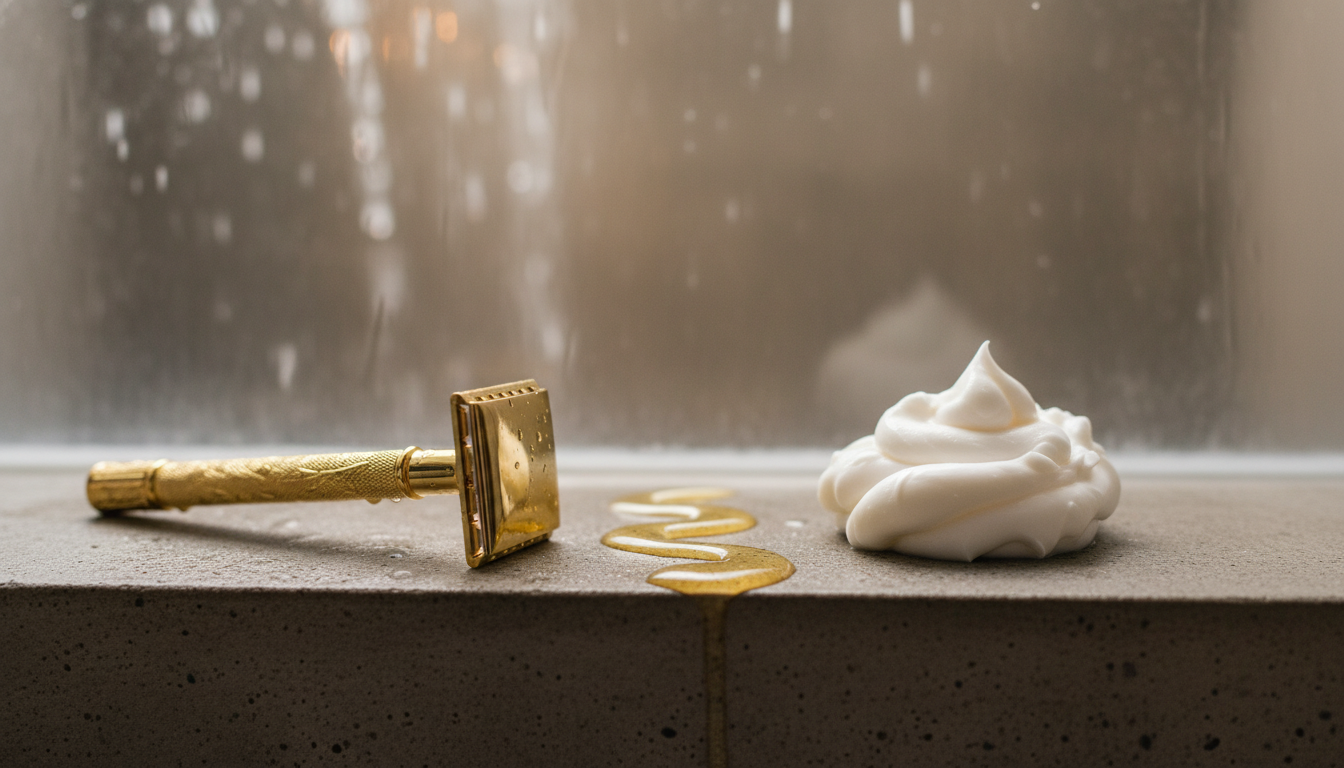
Phase 4: The Precision Shave
If you shave, this is the time. Your hair follicles are softened from the steam and exfoliation, reducing the risk of razor burn and ingrown hairs by 60% compared to a dry or quick shave.
The Lubricant Matter
Never shave with just water or bar soap. Bar soap is alkaline and raises the pH of the skin, leading to dryness.
- Best: Shave oil or a thick, moisturizing shave butter.
- Good: Hair conditioner (in a pinch).
- Avoid: Soap bars.
The Technique
1. Fresh Blade: Using a dull blade is the #1 cause of irritation. Replace your blade every 3-5 Everything Showers.
2. Direction:
- Legs: Against the grain for closeness (if skin tolerates).
- Bikini/Underarms: With the grain first, then across. Never against if prone to ingrowns.
3. Rinse: Rinse the blade after every single stroke.
Expert Tip: If you are prone to strawberry legs (keratosis pilaris), apply a salicylic acid wash after shaving to clear out the pores, but be warned—it may tingle.
Phase 5: The Final Double Cleanse
You have exfoliated and shaved. Now, you must wash off the scrub residue, the shave oil, and finally rinse out the hair mask.
1. Rinse the Hair
Let your hair down. Rinse with cool water to seal the cuticle. Ensure all product is off your back.
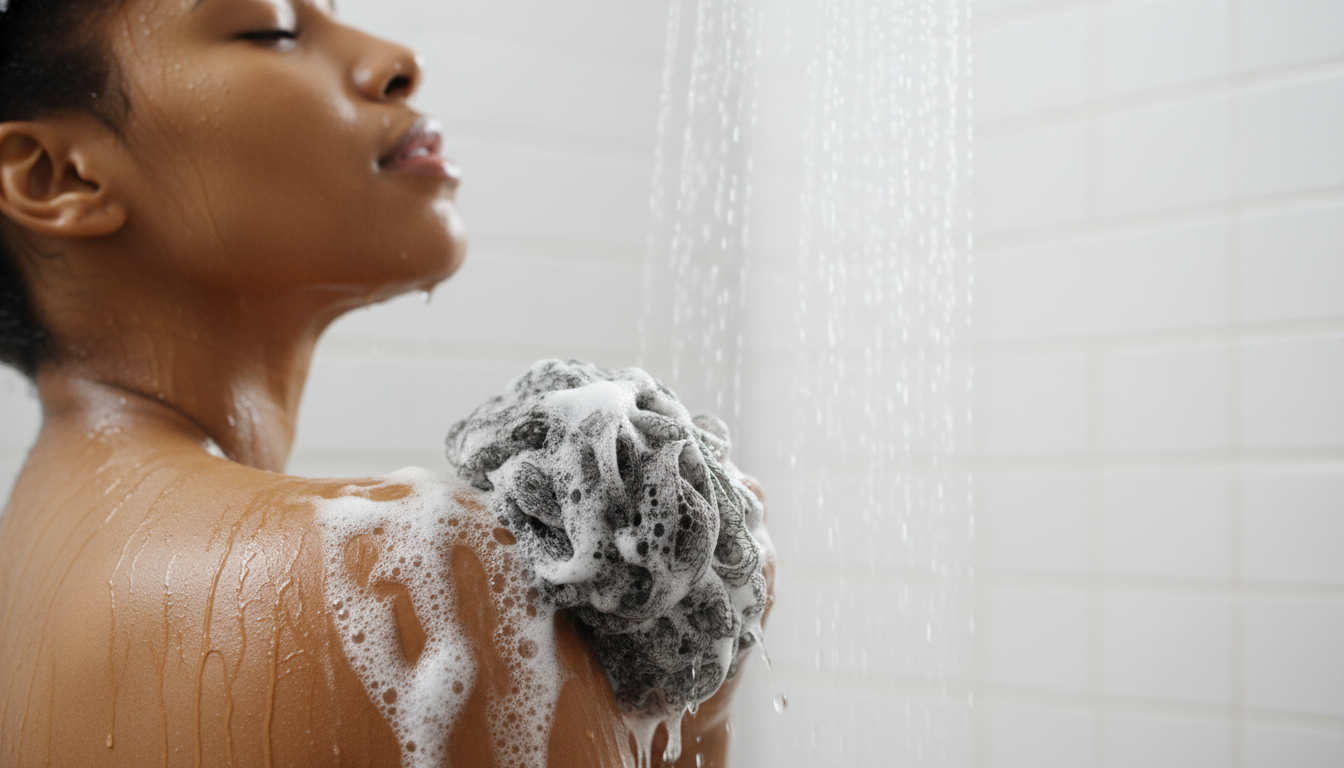
2. The Body Wash (The Cleanse)
Now, use a pH-balanced body wash and a fresh loofah or african net sponge.
Why now? You need to remove the oil residue from the scrub and shave oil to prevent clogged pores. If you wash before shaving, the oil sits on top of clean skin. Washing after* ensures you are truly clean.
- Target Areas: Focus on the back, chest, and behind the ears.
3. Face Cleansing
Wash your face last.
- Reason: Shampoo and conditioner runoff likely touched your face. You want to wash that residue off to prevent hairline acne.
- Product: Use a gentle, hydrating cleanser. Avoid active cleansers (acids) if you plan to do a face mask post-shower.
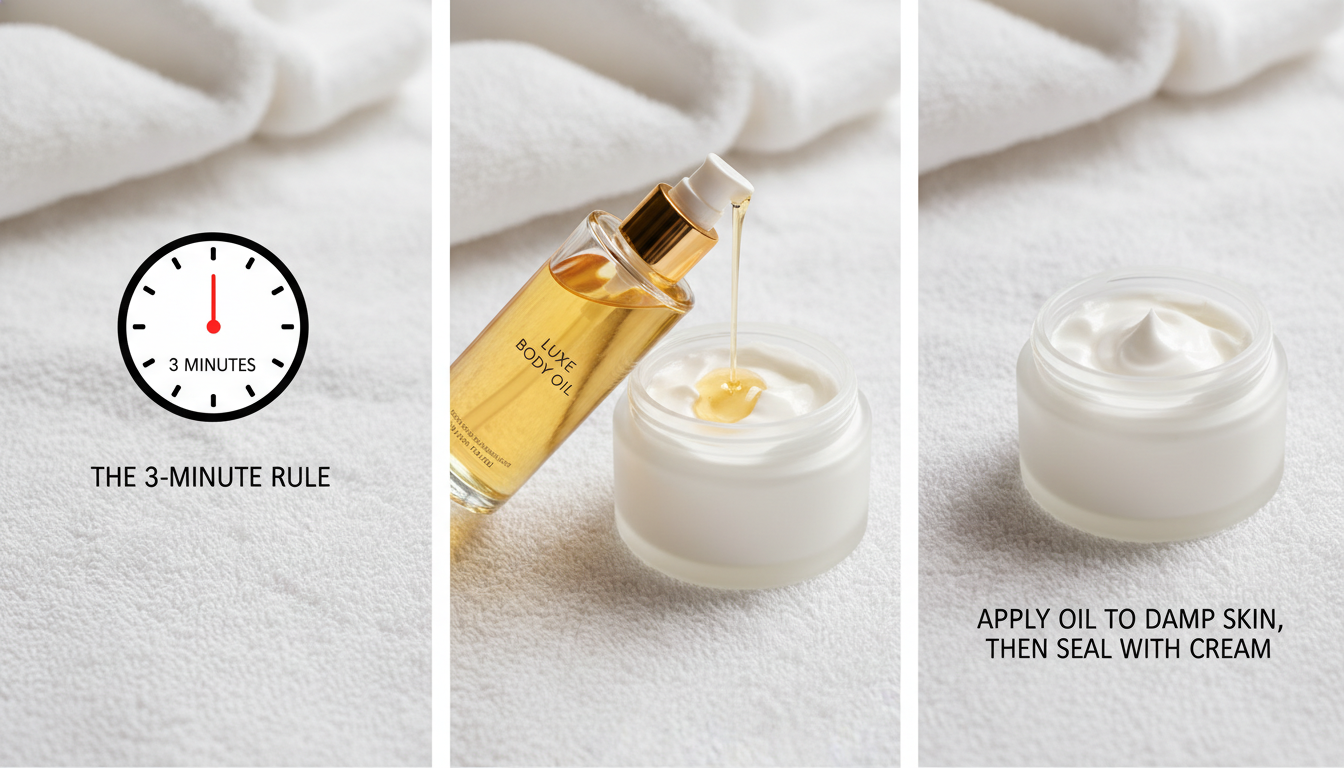
Phase 6: Post-Shower Moisture (The 3-Minute Rule)
The Everything Shower isn’t over when the water stops. The post-shower window is critical for Transepidermal Water Loss (TEWL).
The Damp Skin Protocol
Do not towel dry completely. Pat your skin until it is damp (about 80% dry).
The Order of Application:
1. Humectant (Hyaluronic Acid/Glycerin): Apply a body serum or light lotion while skin is wet to draw water in.
2. Occlusive (Body Butter/Oil): Seal the hydration with a thick butter or body oil.
Ingredient Spotlight: Urea
If you have rough skin, look for a lotion containing 10% Urea. It is both a humectant and a keratolytic (exfoliant), making it the gold standard for soft skin.
Body Glazing
For that viral “glazed donut” look:
- Mix your body lotion with a few drops of body oil in your palm before applying. This creates an emulsion that penetrates deep but leaves a sheen.
Phase 7: Facial Skincare & Maintenance
While your body is marinating in lotion, attend to the face.
Post-Shower Face Routine
Since your pores are dilated from the steam:
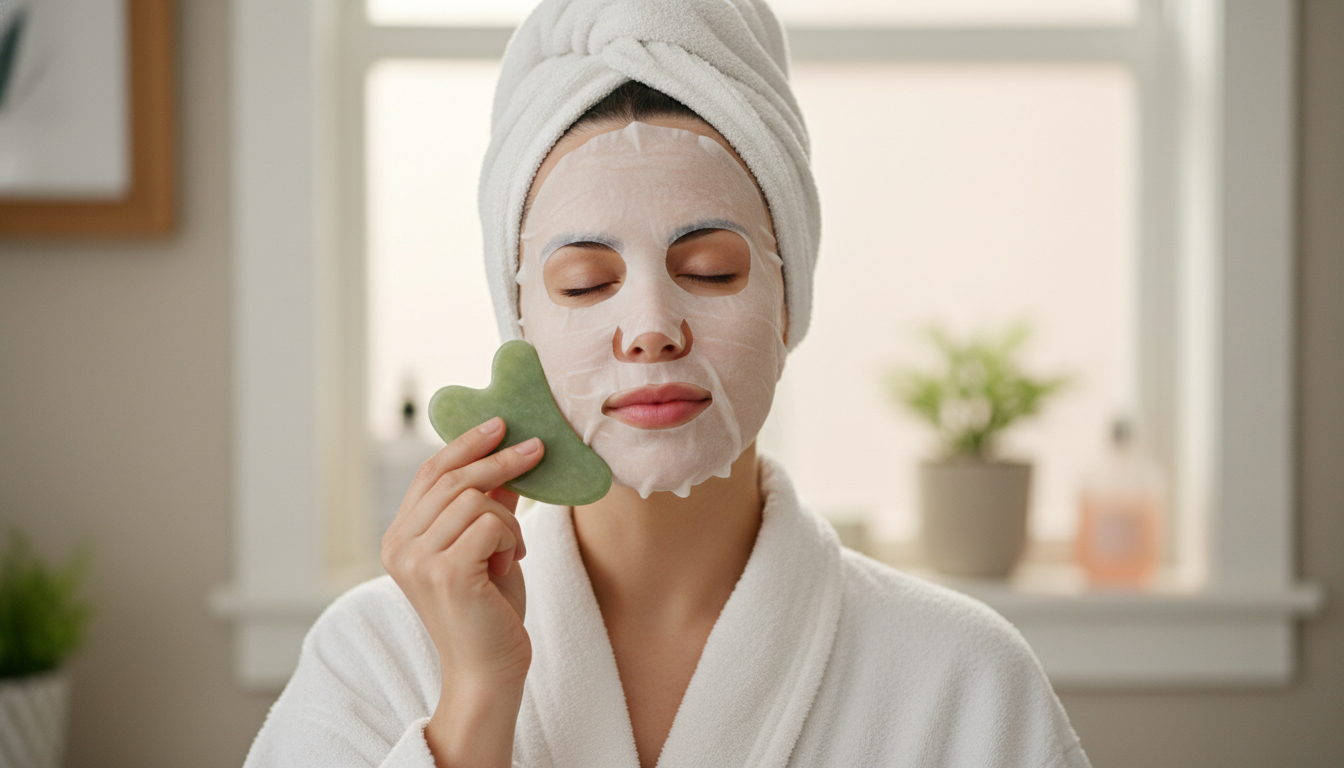
1. Clay Mask (Optional): If you have oily skin, apply a clay mask for 10 minutes to draw out impurities.
2. Sheet Mask: For hydration, apply a chilled sheet mask. The coolness constricts blood vessels, reducing the redness from the hot shower.
3. Gua Sha: With facial oil applied, perform lymphatic drainage massage to reduce facial puffiness.
Hair Post-Care
- Microfiber Towel: Never rub hair with a terry cloth towel. Squeeze into a microfiber turban to reduce friction.
- Leave-in: Apply leave-in conditioner immediately.
- Air Dry vs. Blowout: For a true “Low Maintenance” week, do a blowout now. It takes effort, but it means you don’t have to style your hair for the next 3-4 days.
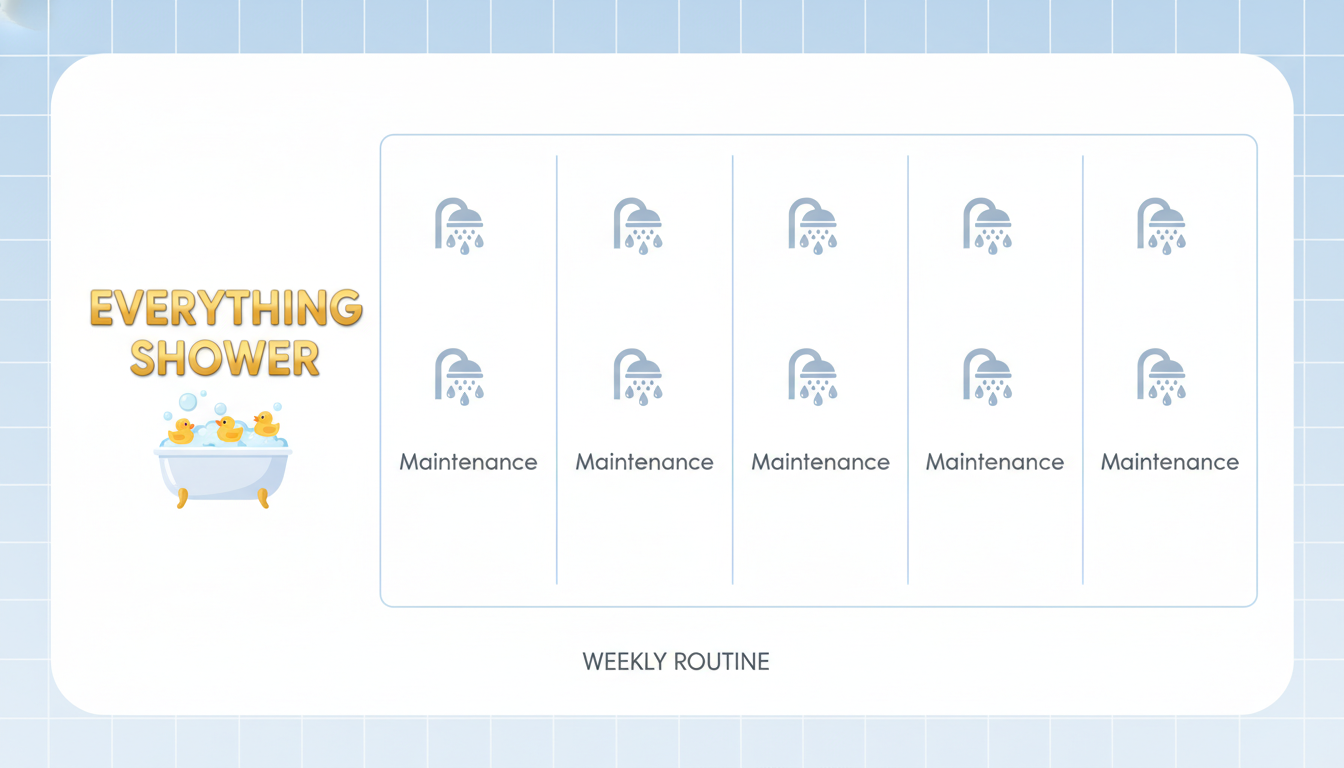
Comparison: Everything Shower vs. Maintenance Shower
It is vital to understand that an Everything Shower is unsafe for daily use. Here is the breakdown of how to structure your week.
| Feature | Everything Shower | Maintenance Shower |
|---|---|---|
| Frequency | 1x Weekly (Sunday Reset) | 4-6x Weekly |
| Duration | 45-90 Minutes | 5-10 Minutes |
| Exfoliation | Full Body (Physical/Chemical) | None or gentle washcloth only |
| Hair | Clarify + Deep Mask | Standard Wash or Dry Shampoo |
| Goal | Deep Reset, Exfoliation, Shaving | Hygiene, Sweat Removal |
| Water Usage | High (50+ Gallons) | Low (15-20 Gallons) |
The Danger of Overdoing It:
Performing an Everything Shower more than once a week can lead to a compromised barrier, characterized by redness, itching, and overproduction of oil as the skin tries to compensate for being stripped.
Expert Contrarian Viewpoint: The Downsides
As an SEO specialist and beauty analyst, I must present the other side. The “Everything Shower” trend promotes consumerism and potential skin damage if blindly followed.
1. The Cost of Products
An Everything Shower routine can easily cost $200+ in initial product investment (Olaplex, Tree Hut, Sol de Janeiro, razors, lotions).
- Expert Advice: You do not need viral brands. Generic sugar, olive oil, and a sharp razor perform 90% of the work. Focus on ingredients, not labels.
2. Water Waste
These showers are environmentally taxing.
- Mitigation: Turn the water OFF during the exfoliation, shaving, and hair masking phases. Only use water to rinse. This saves up to 30 gallons per session.
3. Barrier Disruption
Using a scalp scrub, a body scrub, a shave razor, and a loofah in one session is aggressive. If you have Eczema or Rosacea, the Everything Shower is likely too harsh. Modification is key—skip the physical scrub and stick to chemical exfoliants which are gentler.

Real-World Case Studies: Customizing the Routine
One size does not fit all. Here is how to adapt the routine based on skin type and lifestyle.
Case Study A: The ‘Dry & Sensitive’ Type
- Problem: Prone to eczema and itching after hot water.
- Modification: Water temp must be cool/lukewarm. Skip the salt scrub (too harsh); use a sugar scrub with shea butter base. Use an oil-based body wash.
Case Study B: The ‘Gym Rat/Acne Prone’ Type
- Problem: Bacne and sweat buildup.
- Modification: Pre-wash hair upside down to keep conditioner off the back. Use a Benzoyl Peroxide wash on the back/chest (leave on for 2 mins). Skip heavy body butters on acne-prone areas.
Case Study C: The ‘Busy Mom’ (Speed Run)
- Problem: Only has 20 minutes, not 90.
Modification: Apply hair oil morning of Shower: Wash hair immediately -> Apply rapid mask -> Shave lower legs only while mask sits -> Rinse. Mix lotion and oil in hand for one-step moisturizing. Total time: 18 minutes.

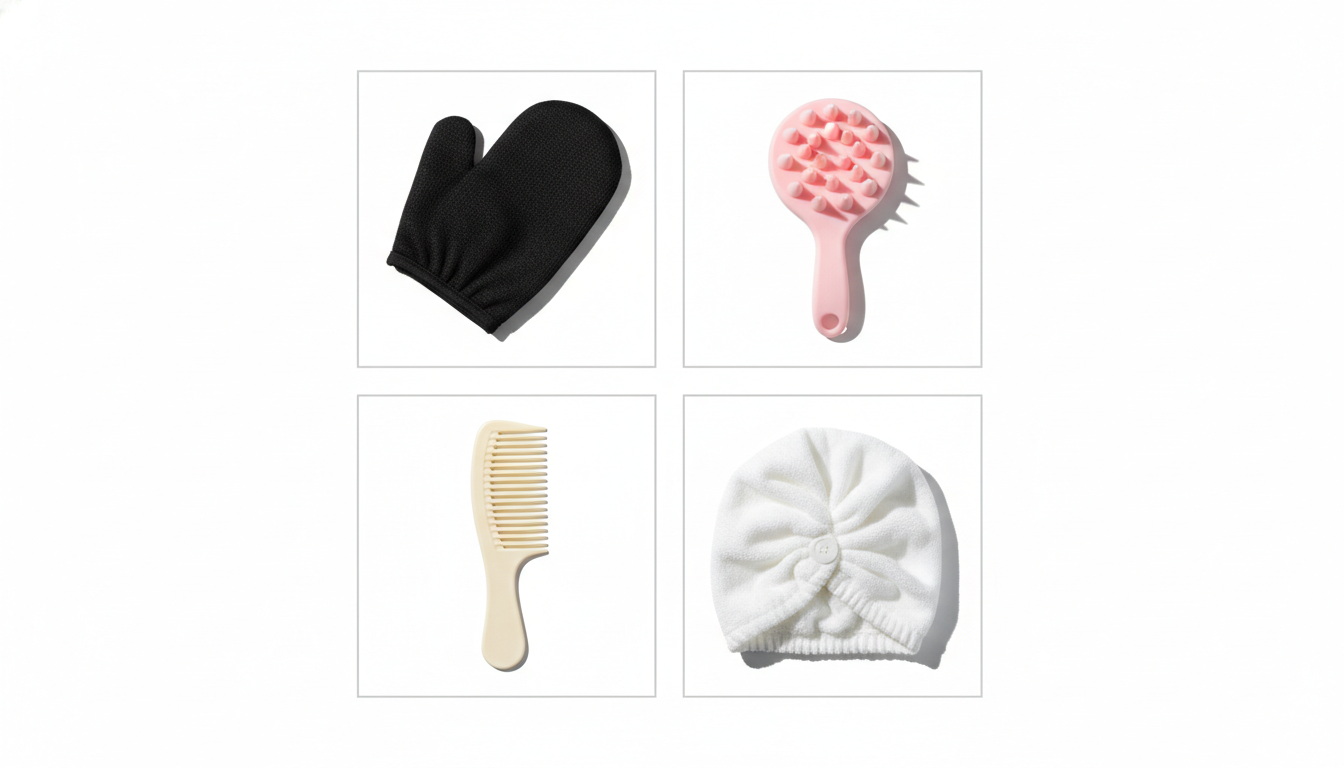
The Gear List: Essential Tools
You cannot perform surgery without a scalpel, and you cannot perform an Everything Shower without the right hardware. This is your shopping list for efficacy.
1. The Exfoliation Glove (Kesa Mitt)
Forget plastic loofahs. A Turkish or Korean exfoliation mitt peels dead skin off in visible rolls. It is reusable and far more sanitary than a loofah.
2. Scalp Massager
Silicone spikes. Essential for working shampoo into a thick mane and stimulating blood flow without tangling.
3. The ‘Shower Beer’ or ‘Shower Water’ Cup
A suction-cup holder for your beverage. Hydration (or relaxation) is part of the mental reset.
4. Microfiber Hair Wrap
Standard towels cause friction frizz. A turban cuts drying time by 50%.
5. Wide-Tooth Comb
For distributing the hair mask evenly in the shower. Never use a fine-tooth comb on wet hair; it snaps the strands.
Frequently Asked Questions
How often should I do an Everything Shower?
Limit the full Everything Shower to once a week or once every two weeks. The exfoliation and deep cleansing are too harsh for daily frequency and can strip the skin barrier.
What is the correct order of an Everything Shower?
The golden rule is Top-to-Bottom: 1. Hair (Cleanse & Mask), 2. Body Exfoliation (while mask sits), 3. Shave, 4. Rinse Hair, 5. Body Wash (remove residue), 6. Face Wash.
Why do I feel exhausted after an Everything Shower?
This is common due to vasodilation. The heat and steam lower your blood pressure and dehydrate you. Ensure you drink ice water during the shower and finish with a blast of cool water.
Can I do an Everything Shower if I have sensitive skin?
Yes, but modify the tools. Swap salt scrubs for sugar scrubs, use lukewarm water instead of hot, and avoid chemical peels on the same day as physical exfoliation.
How long does an Everything Shower take?
A comprehensive routine takes between 45 to 90 minutes. This includes pre-shower dry brushing and post-shower moisturizing.
Should I shave before or after exfoliating?
Always exfoliate before shaving. This removes dead skin cells that clog razors and lifts hairs away from the skin, resulting in a closer shave and fewer ingrown hairs.
What is the best way to keep hair out of the way?
Use a large claw clip. Avoid elastic ties on wet hair as they cause breakage. A claw clip holds the hair up securely while the mask penetrates.
Does the Everything Shower waste water?
It can. To be eco-friendly, turn the water off while you are dry brushing, applying hair masks, scrubbing the body, and shaving. Only run water for rinsing and warming up.
Also, read:- Ultimate 6-Step Everything Shower Routine for Glowing Skin
Discover more from innerspiritglow
Subscribe to get the latest posts sent to your email.